First phase: Get 3D model which does fir to your plan from the online databases
Because I did want to cast chocolate version of the our landmark statues, I did start by exploring different 3D artefact repositories. Finally I found many suitable models from the SketchFab.
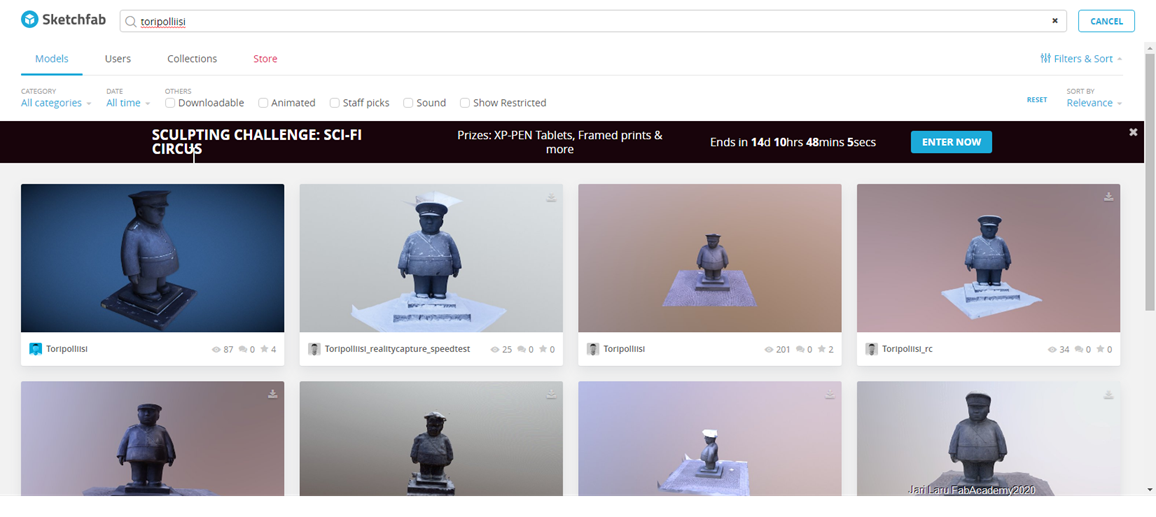
Many of the models didn't provide download option or quality wasn't good enough. I also wanted emphasize licensing, that I can really use the chosen model without copyright issues
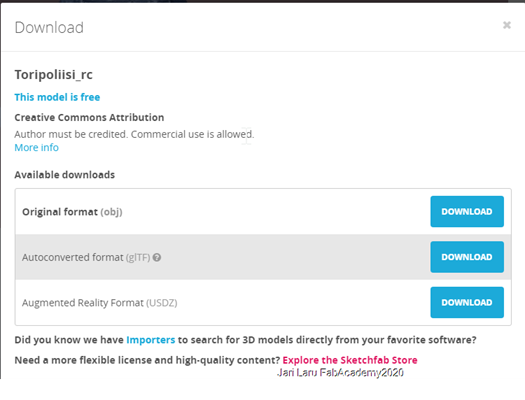
So finally I did end up to choose "toripoliisi_rc" model done by Juha M. I was licenced by using Creative Commons Atribution license (author must be credited) and was downloadable as .obj format.
I knew already that I can import file in .obj format to Autodesk Fusion, so I felt comfortable of choosing this model.
Second phase: Importing object to Autodesk Fusion 360 and converting it into solid B-rep object
First try: can't edit imported object: no soluition
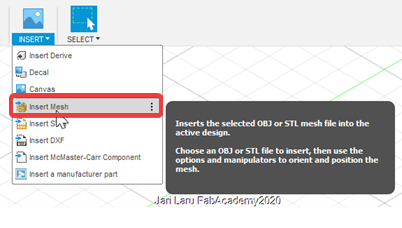
In the second phase 3D model was imported into Autodesk Fusion 360 as .obj object. This can be done by clicking "import" button and choosing "insert mesh" (see figur 3.)
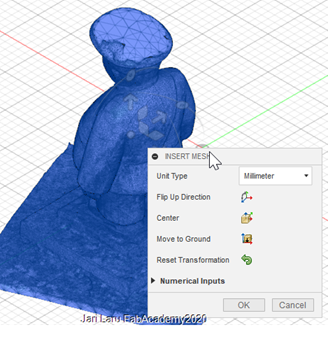
During the import process you can spesify the position of the object with the dialog window which does appaear just after the import (see figure 4.)
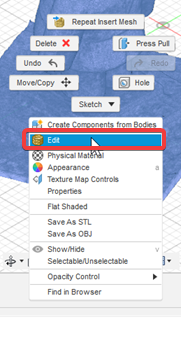
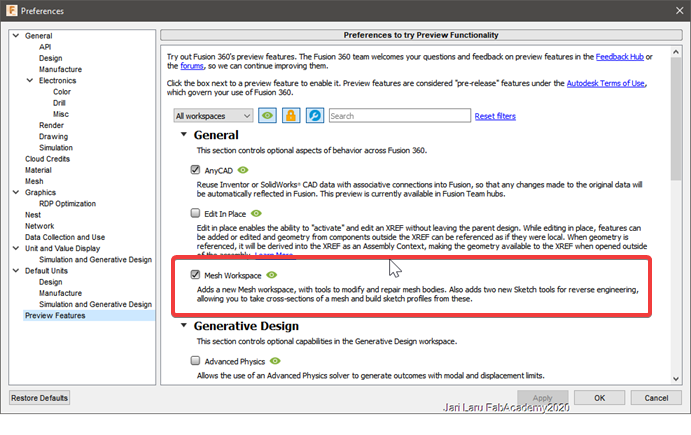
Next you can click "edit mesh" button, but be prepared, you will get warning. I did change settings as suggested, so I did enable mesh workspace. However, it didn't work, I just got same warning again and again. I did feel that I got stuck
I tried to create working place and slice pieces of the statue, because I did want to change stand of the statue. Howerver, I wasn't able to choose my 3D object in the dialog box. I got stuck.
I had intuition that this repeating error about enabling mesh workspace should be solvable, but how. Time to work with tutorials, I think!

Second try: Aaa! I have to convert mesh to Brep
I didn't see any solution and tutorials that I got by googling didn't help either. I would need some keywords and help
I did call to local fablab instructors to ask about two things: a) do I have too complext starting point for mold (answer was no) and b) how edit mesh in Autodesk Fusion 360
Jani Ylioja answered that this idea is doable, that go ahead and Ivan Sanchez did help me by giving keyword: "facet reduction"
In principle, that smaller the triangles, more computing power is needed with 3D models. Howewer, I did use that term as a keyword when I googled tutorial videos and pages and found this: https://knowledge.autodesk.com/support/fusion-360/learn-explore/caas/sfdcarticles/sfdcarticles/How-to-Convert-a-Mesh-to-a-BRep-in-Fusion-360.html
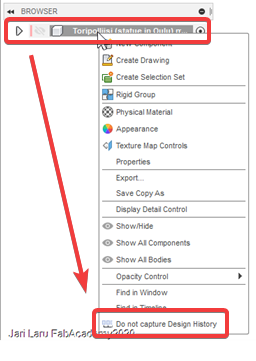
So, in practise I should convert mesh body of statue into solid B-Rep. This would be possible only in direct modeling mode which can be enabled by clicking "do not capture design history" -mode checkbox
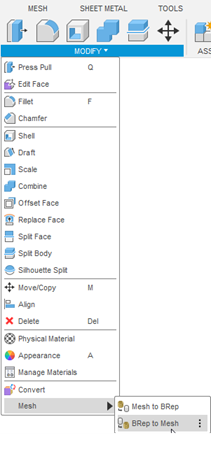
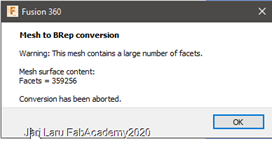
(see figure 7.)After design history was turned off, I noticed "Mesh-to-Brep" button from the modify menu. It did appear there after turning on direct modeling mode. So, in practise, now I was able to transform my mesh to solid object! Hurray!!
O-Ou. Autodesk Fusion did abort the conversion because of the mesh did contain a large number of facets. So I had to rethink my actions again. Wel, well..
Third try: Oh-ho. I didn't manage to with conversion to b-rep, but got mesh workspace working and was able to continue!
My progress with Fusion360 in this assigment was incremental and full of smaller and bigger disapointmens. However, then just accidentaly I got mesh workspace working! "reminder window" (see above) did disappear and I was able to use tools to edit mesh! Great!
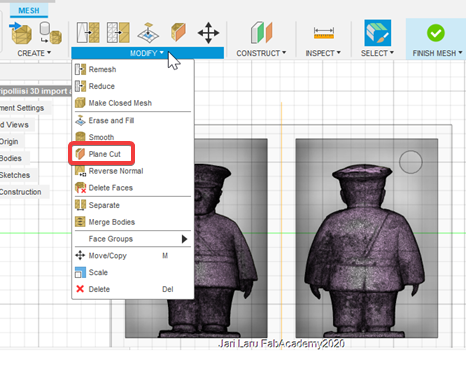
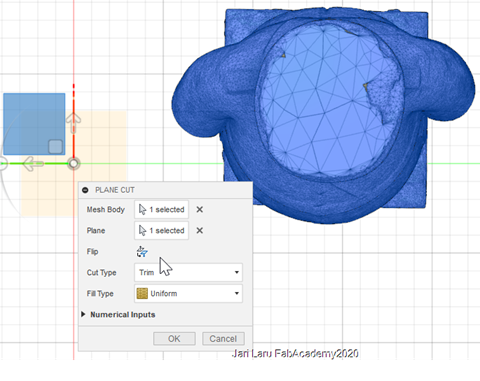
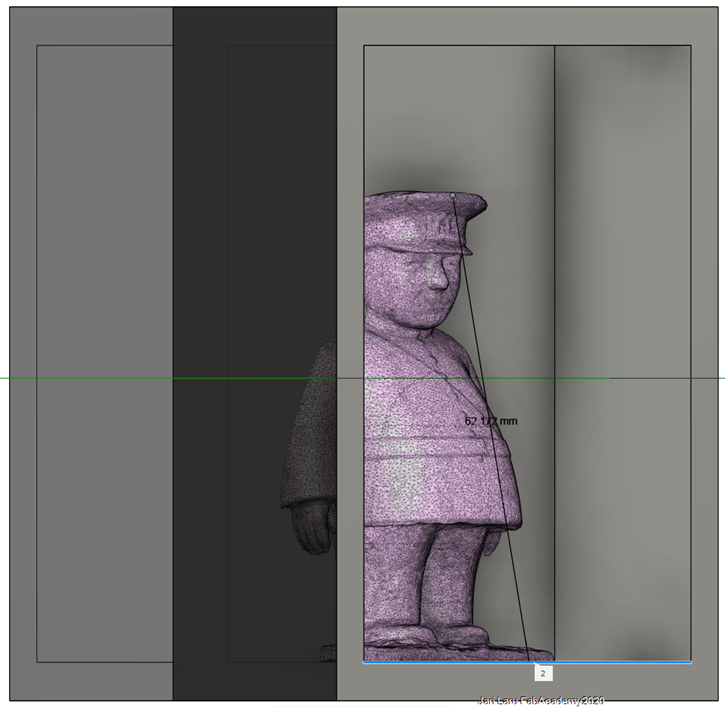
Manipulating mesh with plane cut functionBecause of the limited timeframe I wanted to use Mesh workspace ONLY to cut unnecessary parts of the mesh away and also split statue into to halves and use those new objects in molding.
As figures 11-13 (see below) show I used plane cut command in two different conditions: a) to trim mesh (statue) so in practise, to remove non needed parts of the mesh and b) to split mesh into two new bodies
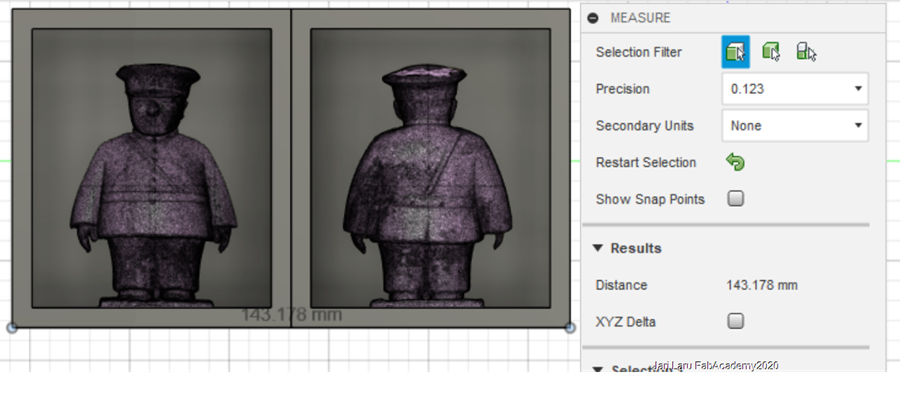
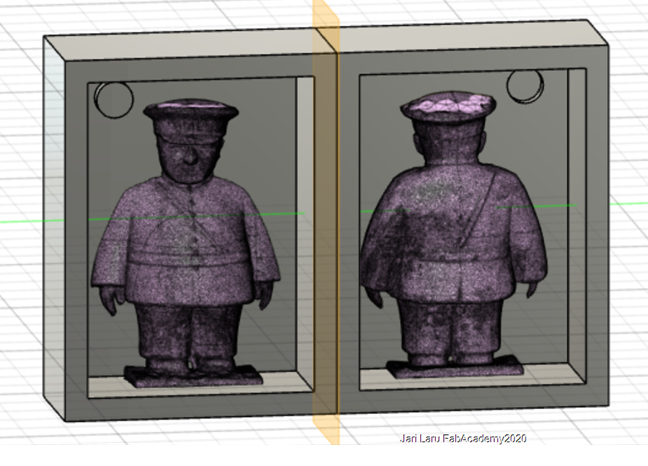
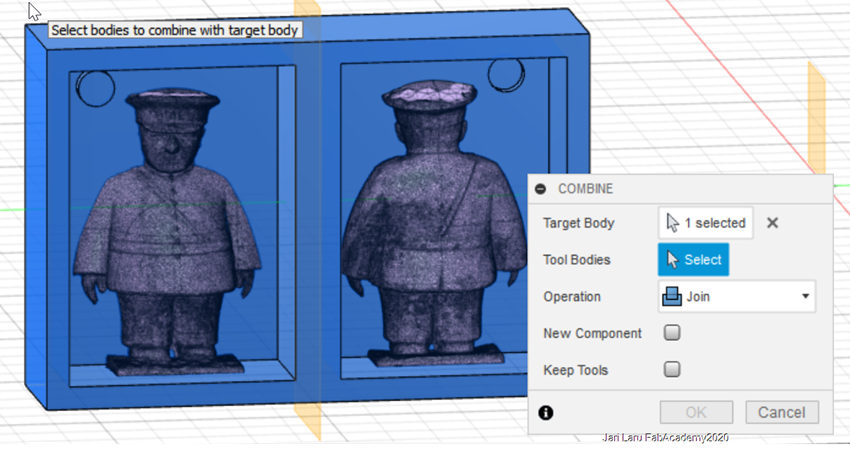
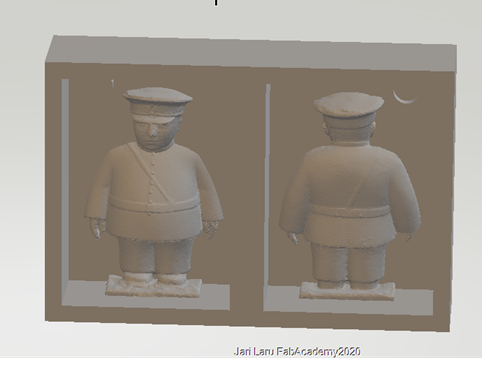
In the figure 14 you can see the box where toripollisi is standing. It's my first version of mold. I did create it by choosig in autodesk fusion: create/box. I did continue by turning it into hollow by choosing: modify/shell (width of the wall 5mm). Then I did copy the box for another half of statue
In this phase mold had a lot of free space and halves of the statue were put into molds agains each other. However, when I got access to FabLab, I noticed that wax block was much more thinner than I had excepted. So, in the figure 15 you can see the condition after I moved also second half of the statue next to first one. This had to do to make molds to fit into block of vax.
Finally I did sketch one guide by using circle tool (diameter 8mm) and extruded it 3mm to make it to be plug (see figure 16). Then sketch was activated from the history and mirrored by using sketch/mirror -tool also to second box. Last thing in the second box was to extrude the circle 3mm to opposite direction to form hole in the mold.
Third phase: Second phase: Preparing the model for the mold creation
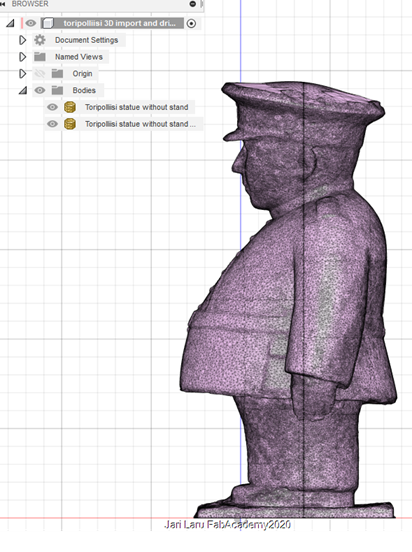
I got finally my statue model into condition that I was able to choose it as a object e.g. slicing
However, my Autodesk Fusion 360 skills are so rusty, that this finetuning of the model will take little bit time
I have followed phases described in this video while preparing the model for next phase:
However, before proceeding to mould milling phase, I want to edit stand of the statue, or remove it. Currently I am practising how to do it efficently in the condition where I am editing imported 360 object. Below is an example of the tutorial video where 360 object is sliced.
Fourth phase: Creating the wax block for final mold
In this phase I will create two separate wax blocks for front and rear sides for the statue
I will follow workflow presented by Jari pakarinen: http://archive.fabacademy.org/archives/2017/fablaboulu/students/70/week_12.html